

In some cases, you may wish to provide access to courses and materials through alternative means, such as an LMS (Learning Management System), a website, or direct email, instead of adding or uploading participants directly into Blanchard Exchange.
Each project you create in Blanchard Exchange allows you to set up a registration link. When individuals click this link, they can enroll themselves by entering their email address. Once registered, they are sent an email from Blanchard Exchange that allows them to set their password and complete their profile, including their first and last name, as well as an optional profile picture.
After completing their profile setup, learners will have access to all course content and materials associated with that specific project.
To enable the registration link on a project, follow the steps below:
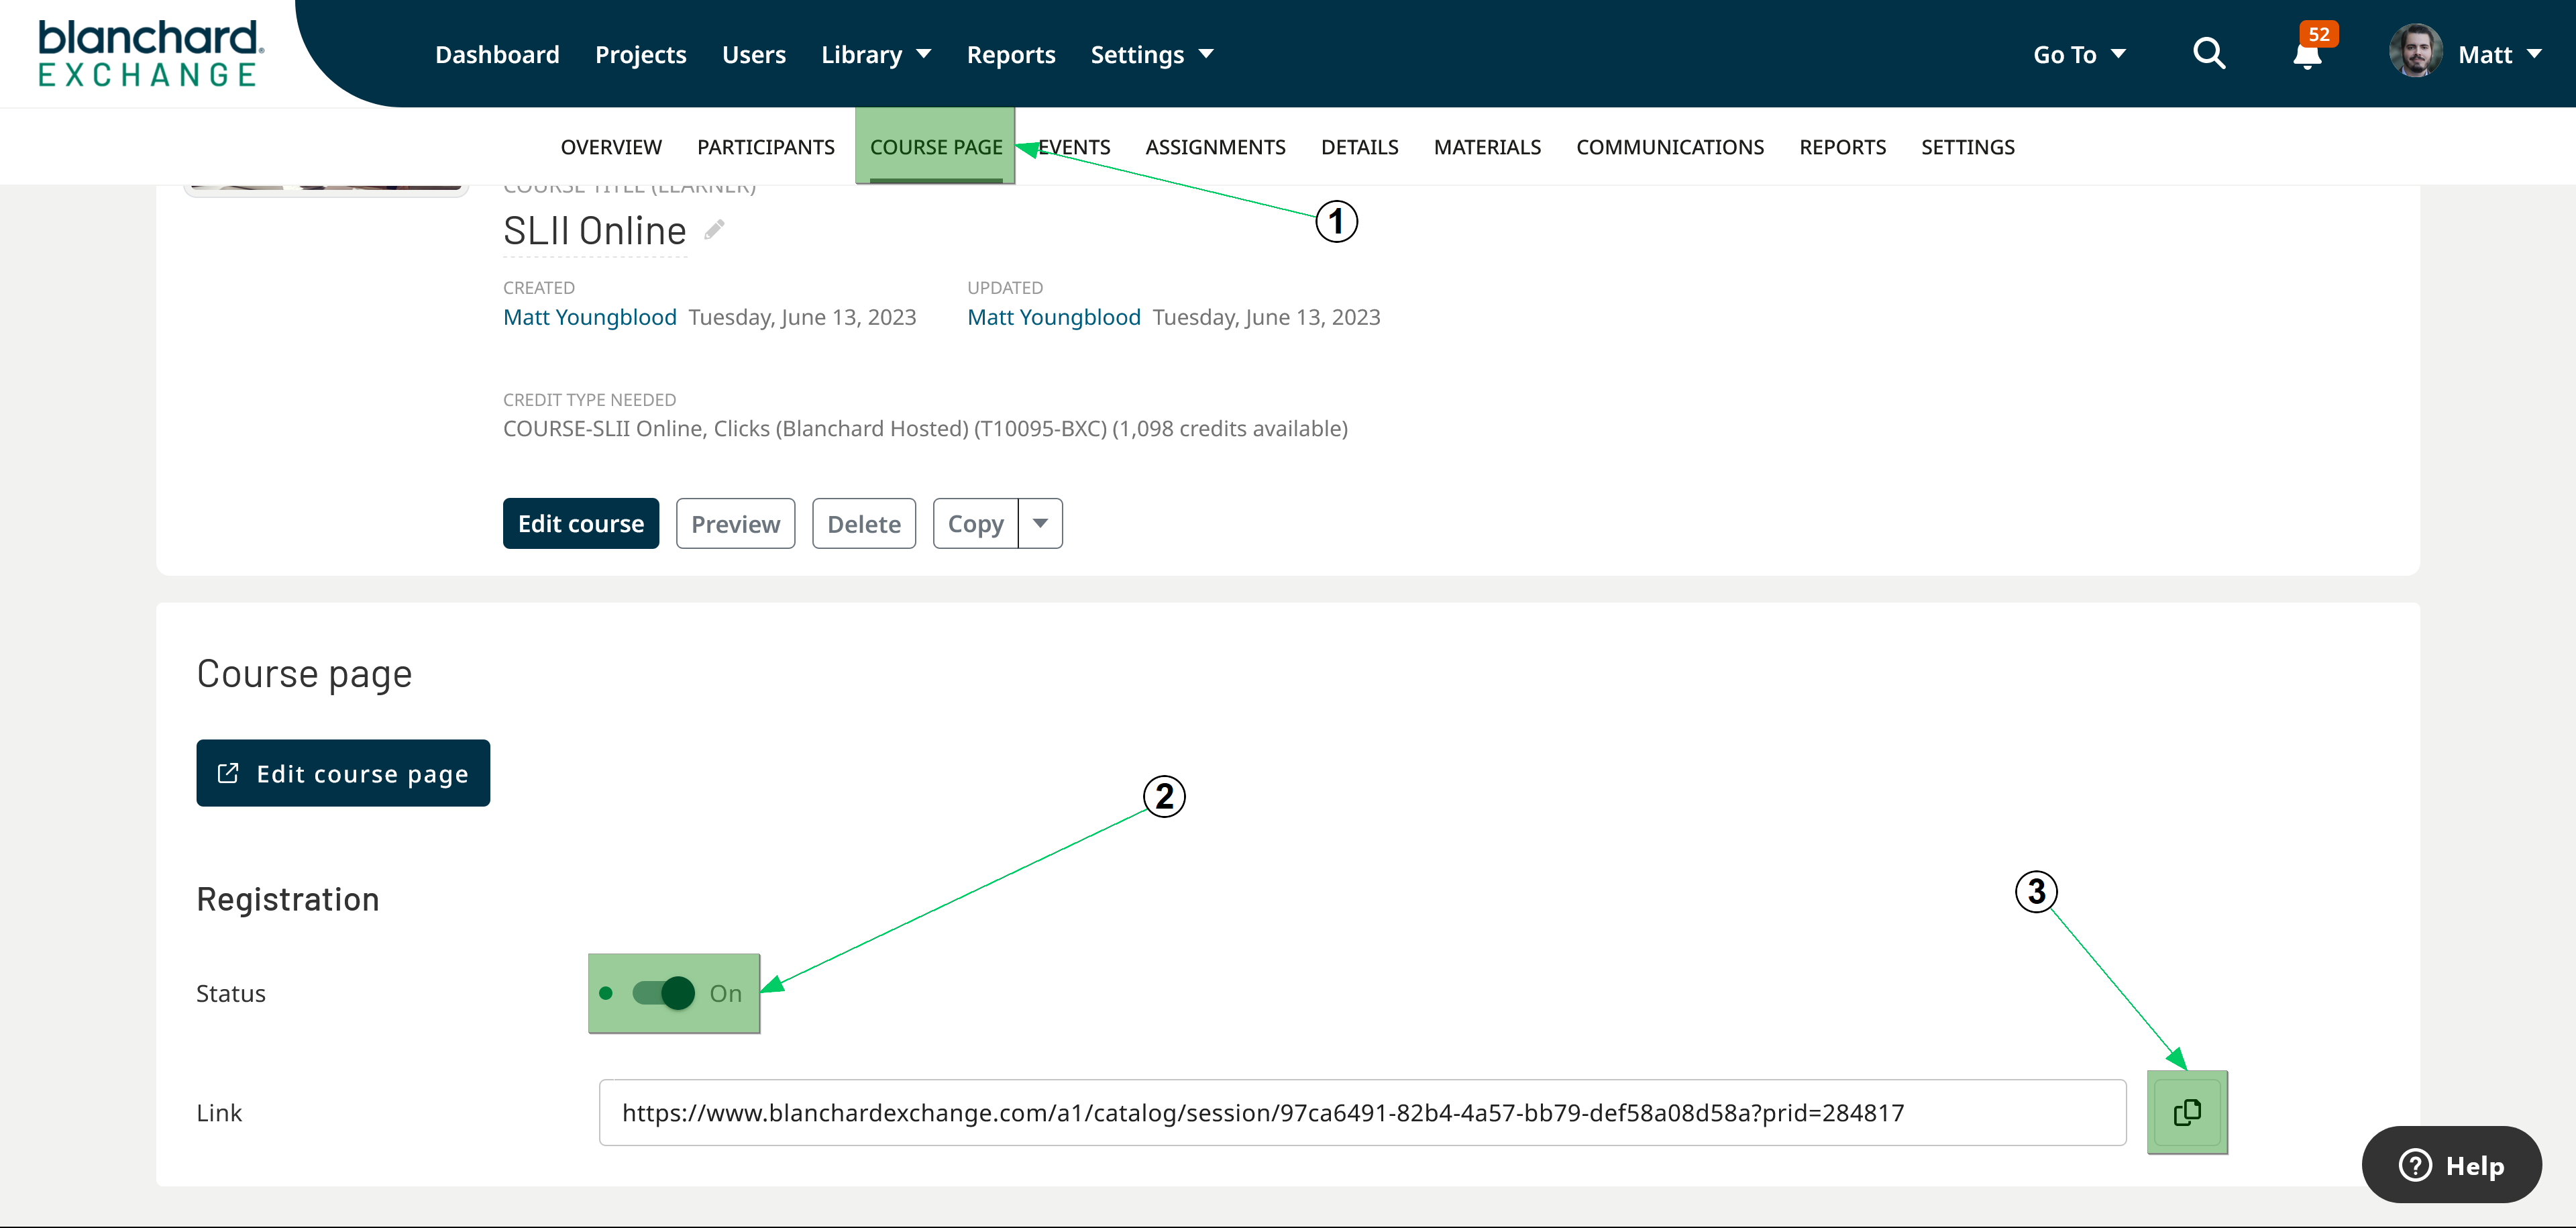
Figure 1
- Select the Course Page tab of your project (Figure 1-1).
- Select the Status toggle to enable the registration link (Figure 1-2)
- Select the Copy button to copy the link.
- (Optional) If you wish to approve each enrollment, select the Moderated toggle. Doing so will add the user to the project upon registration without activating their enrollment. This allows you to review each registration and approve enrollment by sending the invitation manually.
Note: You cannot use an automated communication to send an initial email to the user upon registration when this toggle is enabled. Using this feature assumes you will manually trigger invitations for users who register through the moderated process. - (Optional) You can download a QR code that can be distributed digitally or printed to provide users with an option to scan the QR code associated with the registration link. Locate the Download option below the QR code to save it to your device.
Once you complete step 3, you can decide whether to customize the registration page or leave it as the default. Select the Edit course page button to modify the following fields (Figure 2):
Add background image – Upload a custom background image that will display at the top of the course registration page.
Title – By default, the course title is displayed. Select the title to modify it, then save your changes.
Description – Enter a description that will appear below the title.
Course thumbnail – Displays the course thumbnail associated with the course. You can override this image on the registration page.
Setting Registration Limits
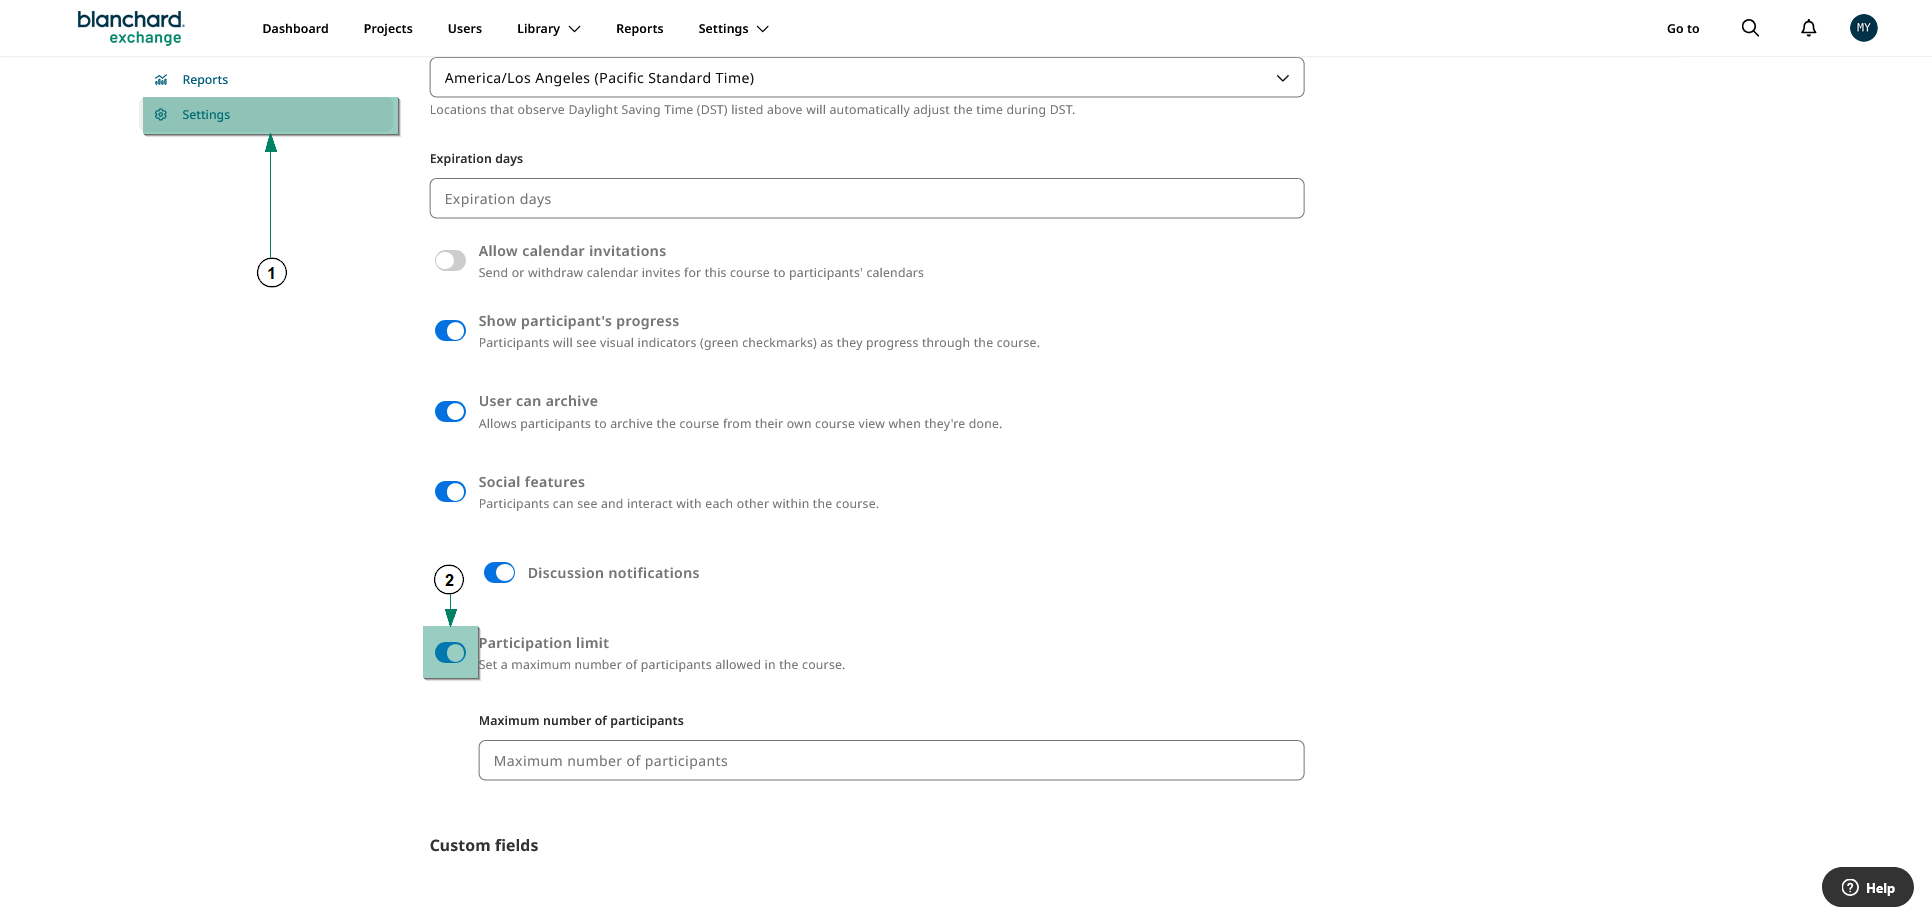
Figure 2
If you wish to limit the number of learners who can register under this project:
- Go to your project's Settings tab (Figure 2-1)
- Select the toggle for the Participant Limit to turn it on (Figure 2-2)
- Enter the maximum number of learners allowed to register (Figure 2-3), followed by selecting Save setting.