

Each project in Blanchard Exchange includes a Project Team section located under the Overview tab. This section allows you to add additional contacts to the project and assign them specific project permissions.
Roles
The following role is available when setting up a new project team member:
Project Trainer – This role provides access to various project details through a unique interface called the Trainer Portal. This interface was designed with on-the-go trainers in mind, with an emphasis on mobile device viewing.
Before setting up an individual for access as a Project Trainer, you may wish to review the introduction and accompanying tutorials for the Trainer Portal interface by clicking here.
Individuals who are set up for access as a Project Trainer will gain access to project information such as:
A roster of learners, with the ability to email learners directly
Learner progress
A record of all communications that have been sent to learners in the project
The ability to preview* the course associated with the project to see exactly what learners experience
Access to integrated assessment feedback reports for all participants in the group, such as the Team Assessment or Change Scan feedback reports
Any live events associated with the course, which will appear directly on the home screen of the Project Trainer interface as upcoming sessions
*Integrated Blanchard products, such as integrated online assessments, will not be accessible in this view. If an individual needs access to these products, you must assign a set of credits to them and add them to the project as a Learner.
Enabling Access
To set up an individual for access as a project team member, navigate to the Project Team section under the Overview tab within your project.
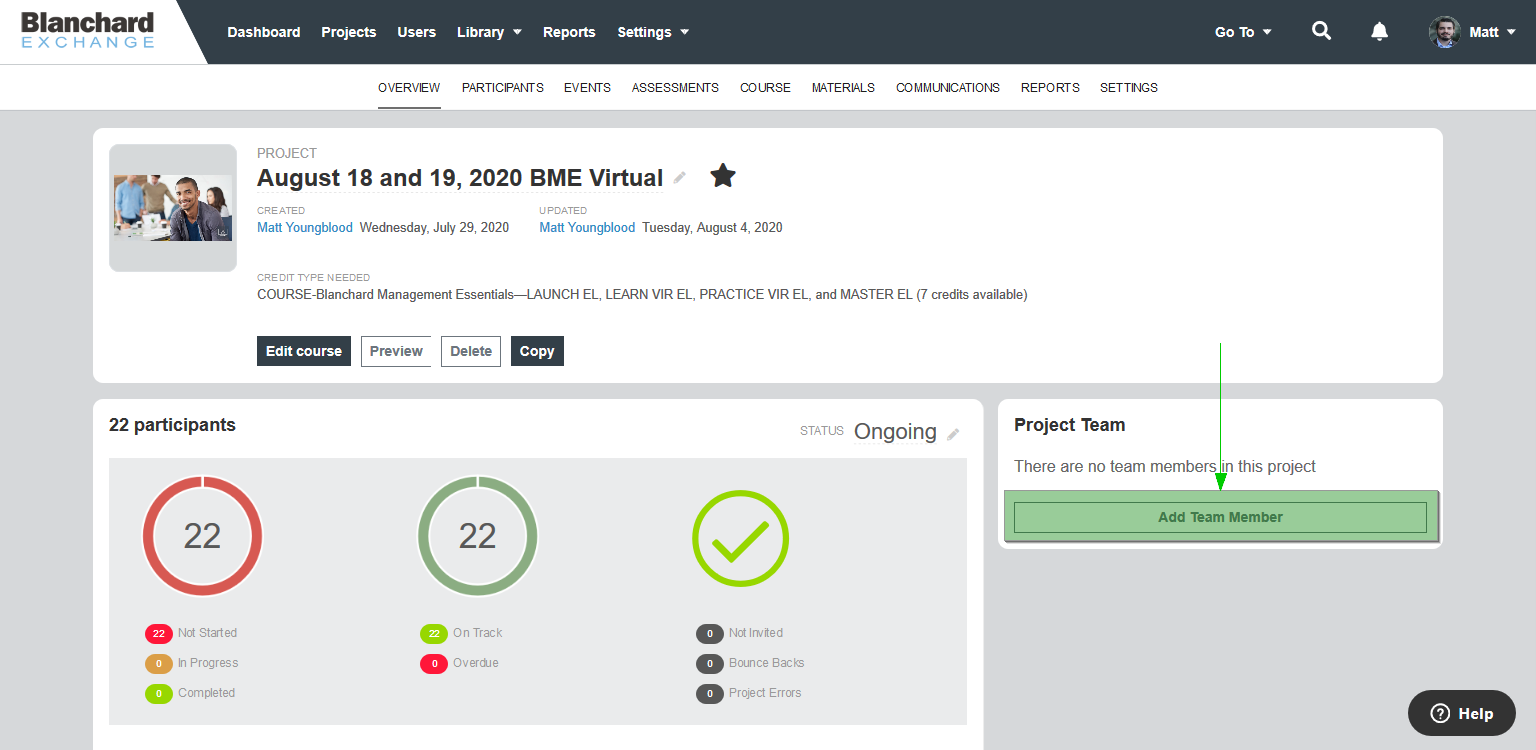
Figure 1
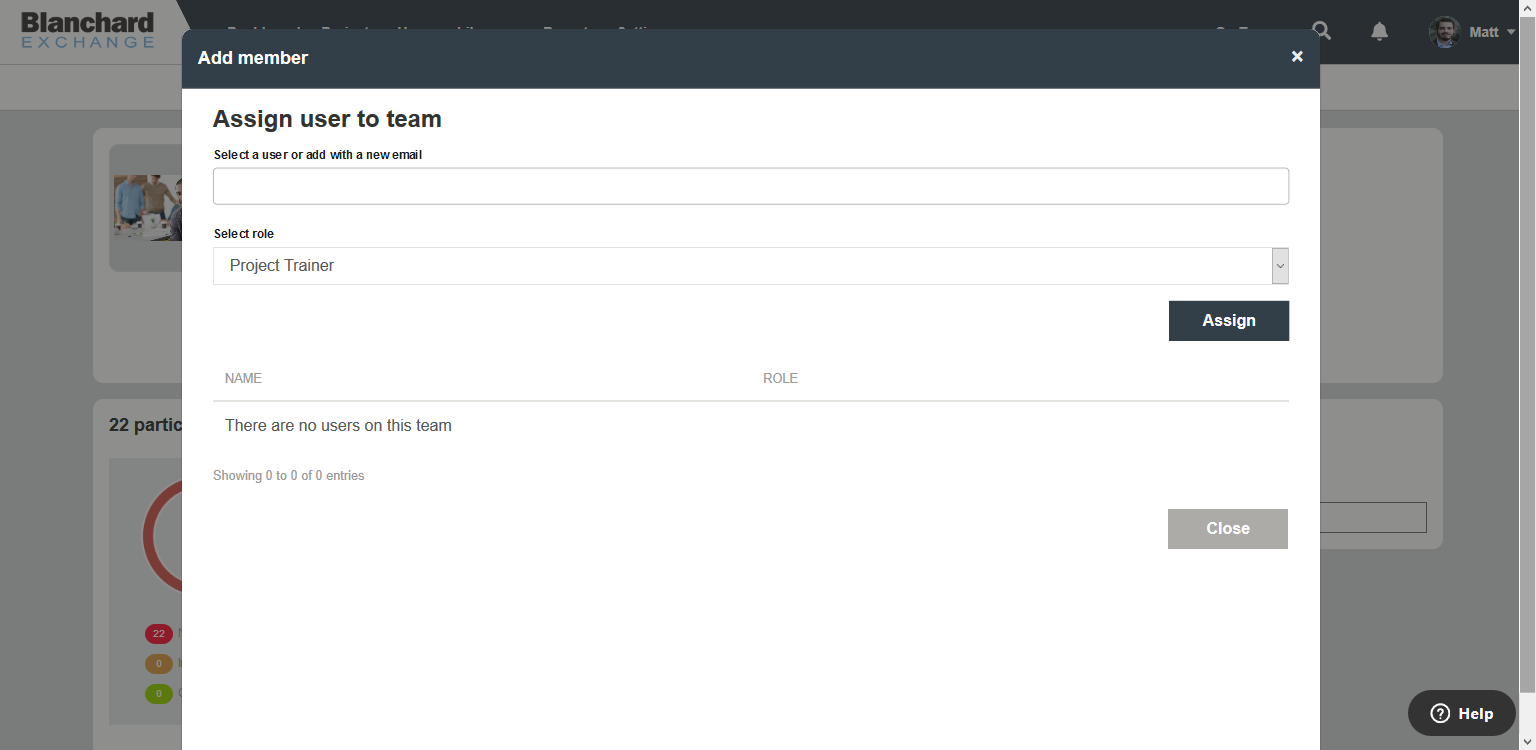
Figure 2
Start typing the email address (or name, if the user is already associated with your account) of the individual you want to add in the Select a user or add with a new email field. If the user already exists in your account, select their name from the list.
Select the Project Trainer role under the Select role option.
Select Assign.
On the following screen, review the invitation. You can adjust the verbiage before sending.
-
Select Send Email at the bottom of the screen.