

Blanchard Exchange offers the ability to create both groups and subgroups, allowing you to save rosters of individuals directly within the system for use with future projects.
For example, you may need to deliver multiple courses to the same group of individuals over a period of time using Blanchard Exchange.
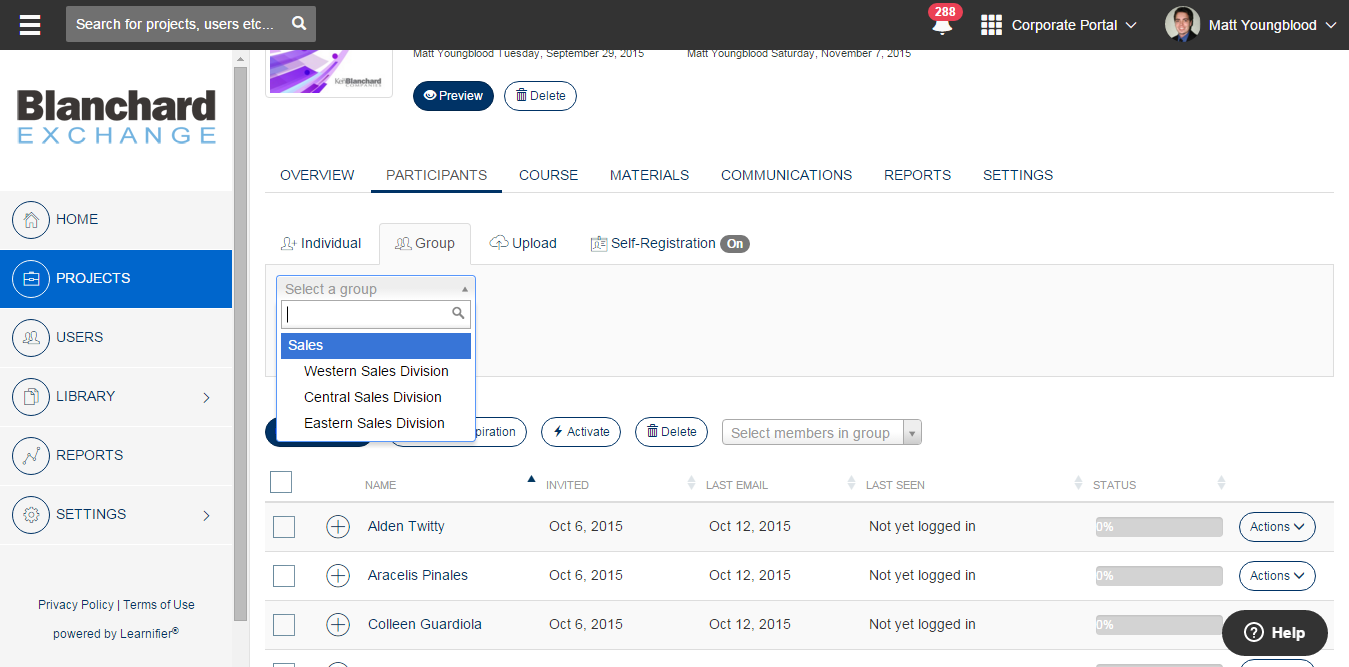
Group Example
Typically, this would require you to keep a Blanchard Exchange roster template (spreadsheet file) saved on your computer and upload that roster into each project at the appropriate time.
Instead, after uploading the roster once, you can create a group and/or subgroup within Blanchard Exchange to store that roster. The group can then be selected when creating new projects, making it easy to add the same individuals without repeatedly uploading roster files.
Creating Groups
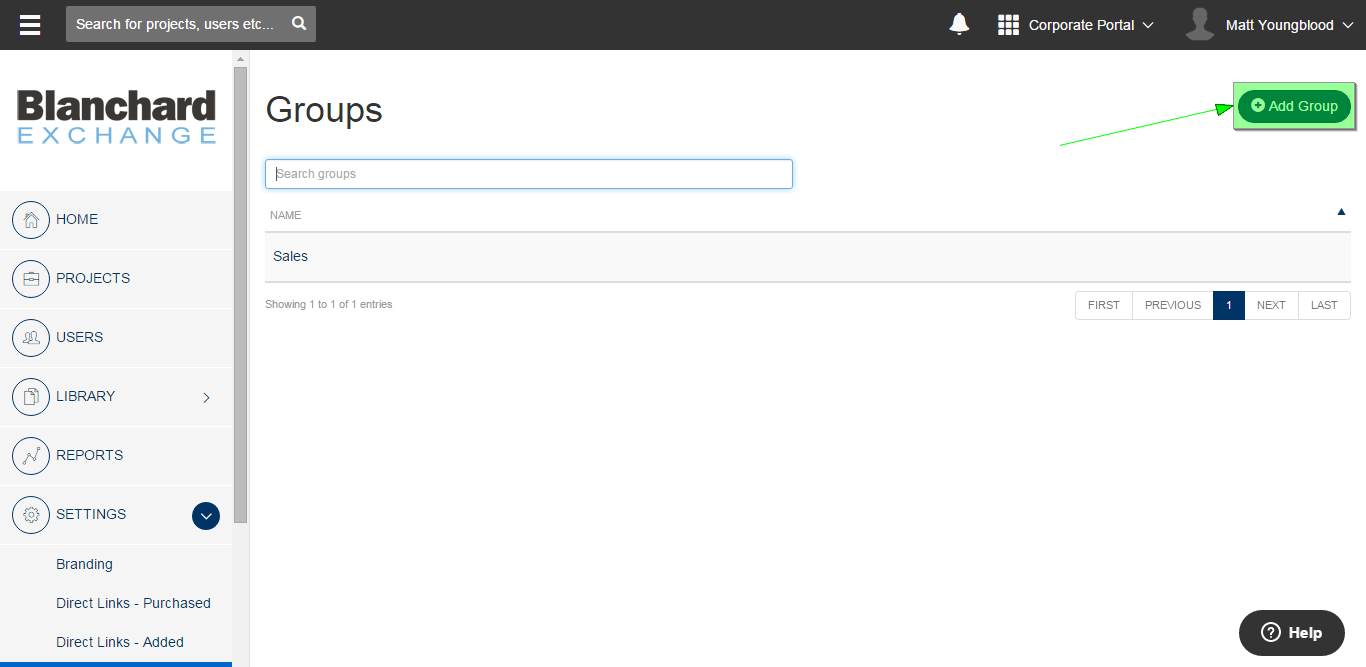
Figure 1

Figure 2

Figure 3
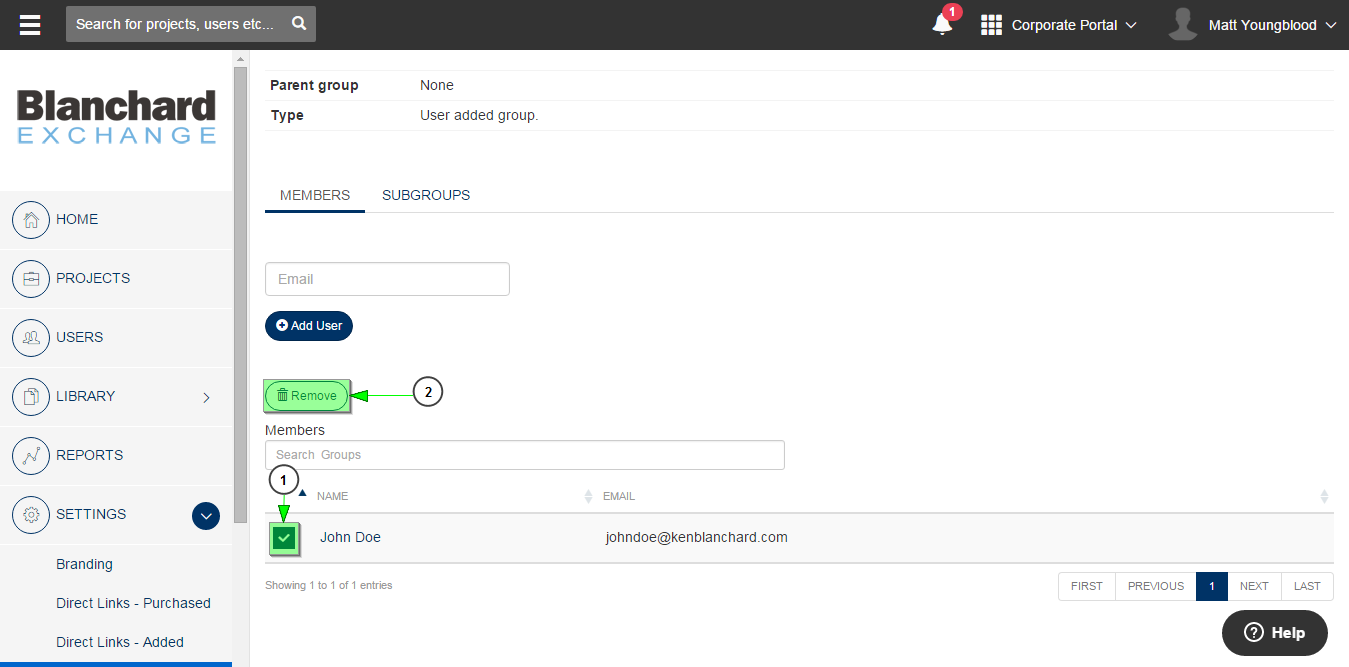
Figure 4
To create a new group, select the Settings tab in your account, then select the Groups option*.
To begin creating a group, select the Add Group button (Figure 1).
Next, enter the group Name (Figure 2-1), then select Save (Figure 2-2).
After the group is saved, you are taken to the group management screen. To edit the group name, select the Edit Group button (Figure 3-1). Alternatively, to delete the group, select the Delete Group button (Figure 3-2).
To add an individual to the group, scroll down to the Individuals tab and enter the individual’s first name, last name, and email address (Figure 3-3). Then select Add User (Figure 3-4). Alternatively, you can select the Upload tab to upload a roster containing first names, last names, and email addresses.
To remove a user from a group, locate the user under the Members section, select the checkbox to the left of their name (Figure 4-1), and then select Remove (Figure 4-2).
*Alternatively, you can create a group from an existing project roster. To do this, go to the project’s Participants tab, select the appropriate users, and then select Add to group. You can either choose an existing group or select the Create group tab to create a new group using the selected users.
Creating Subgroups
It is also possible to create subgroups within groups, allowing for additional organization of users.
For example, you may have a group named Sales. Within the Sales group, you could create multiple subgroups to represent territories, such as Western Sales Division, Central Sales Division, and similar subdivisions.

Figure 5
To create a subgroup, select the Add Subgroup tab while viewing the parent group (Figure 5). Next, enter the subgroup name and select Save. Once saved, the subgroup appears under the Subgroups heading, where you can select it and manage it in the same way as a parent group.
Subgroups can also contain their own subgroups, allowing for multiple levels of hierarchy. There is no limit to the number of nested subgroups that can be created within groups and subgroups.
Using Groups & Subgroups in Projects
Once a group or subgroup is saved, it can be used within projects to add and select users.

Figure 6

Figure 7
To populate a project roster using an existing group or subgroup, open the project, select the Participants tab (Figure 6-1), and then select the Group tab (Figure 6-2).
Next, use the Select a group drop-down menu (Figure 6-3) to choose the appropriate group or subgroup, then select Add participants from group (Figure 6-4) to add all associated individuals to the project.
Additionally, if your project includes a roster made up of users from multiple groups, you can use the Select members in group drop-down menu (Figure 7) to select only users associated with a specific group or subgroup.
This is useful if you need to manually trigger a communication from the project to users in a particular group or subgroup. Once a group is selected from the drop-down menu, the checkboxes next to the associated users are automatically selected, while users who are not part of the group remain unselected.