


Figure 1
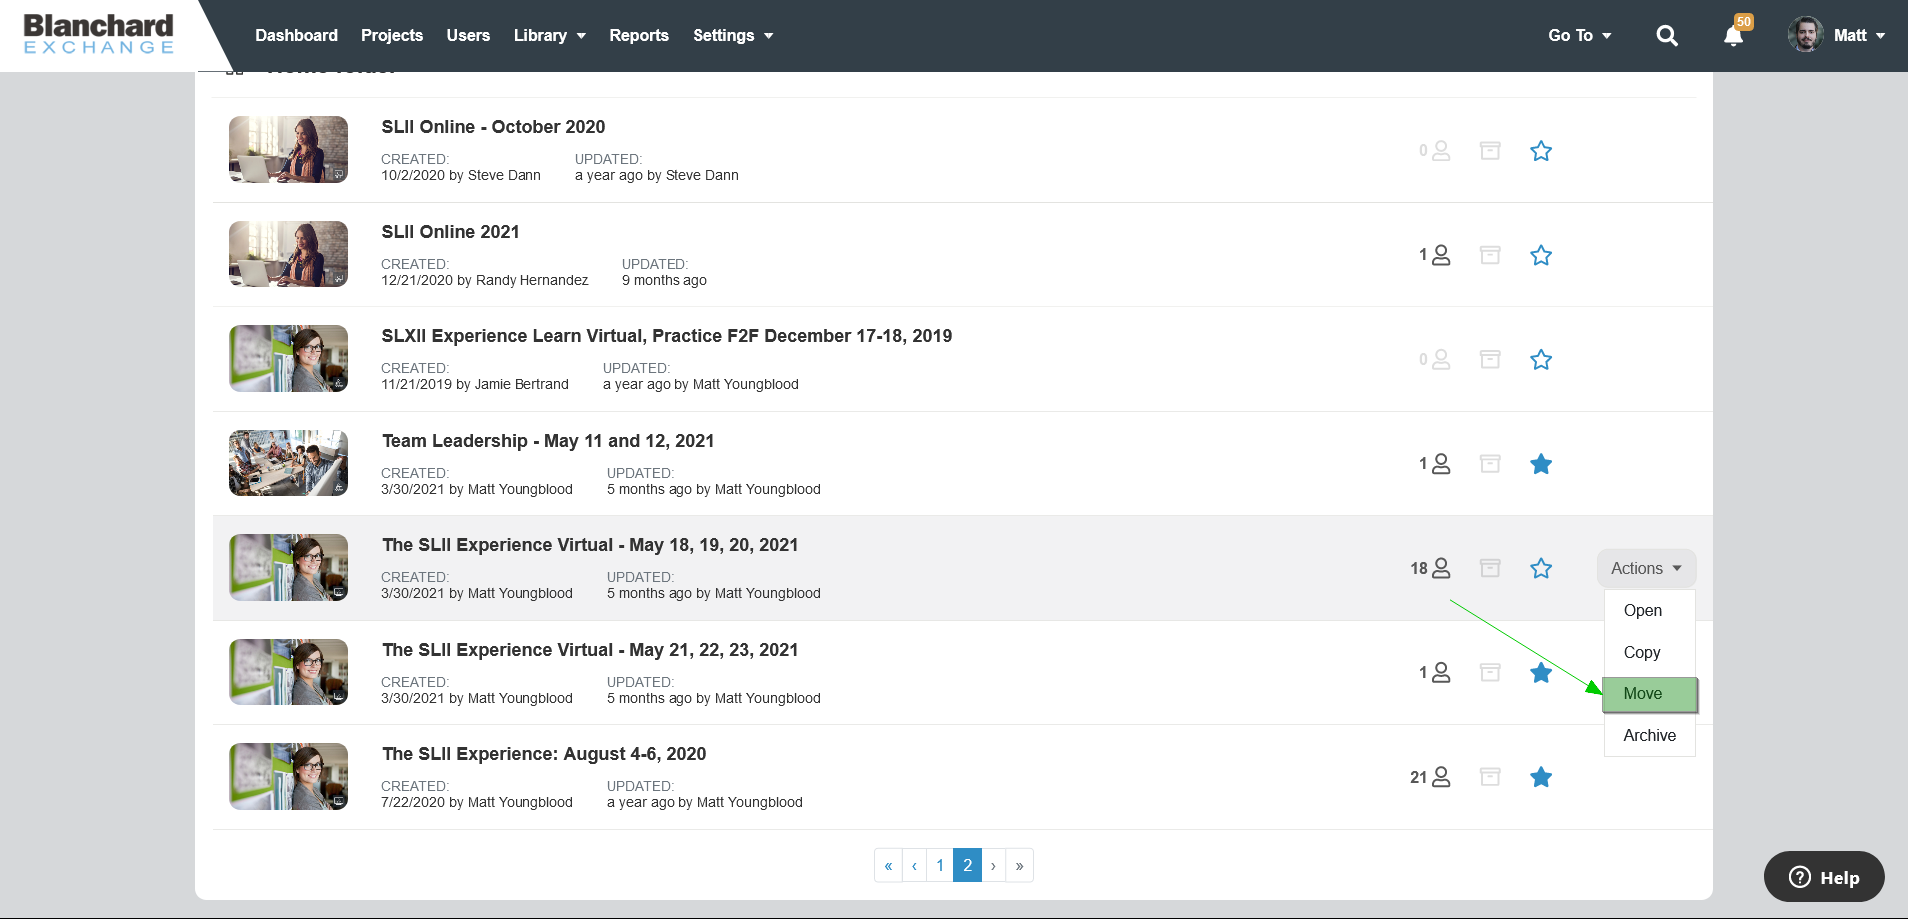
Figure 2
The Projects tab of the Corporate Portal includes the ability to create folders. This is useful if you manage a large number of projects and want to organize them into folders to maintain a clean and manageable list.
Folder names can follow any naming convention that fits your needs. For example, projects can be organized by program, administrator, time period, or other criteria. You can also create folders within folders, allowing for multiple levels of organization.
To create a new folder, go to the Projects tab of the Corporate Portal and select New Folder at the top of the page. Enter a folder name, then select Add folder (Figure 1). The new folder will appear at the top of your project list.
To create a folder within an existing folder, select the parent folder and repeat the steps above.
After creating folders, you can move existing projects into them. Locate the project in your list, hover over it, and select the Actions button on the right-hand side. From the menu, select Move (Figure 2), then choose the destination folder.
You can also create new projects directly within a folder. To do this, navigate to the desired folder and select the New Project button at the top of the page. The project will automatically be stored in that folder once it is created.