

Adding Individual Participants
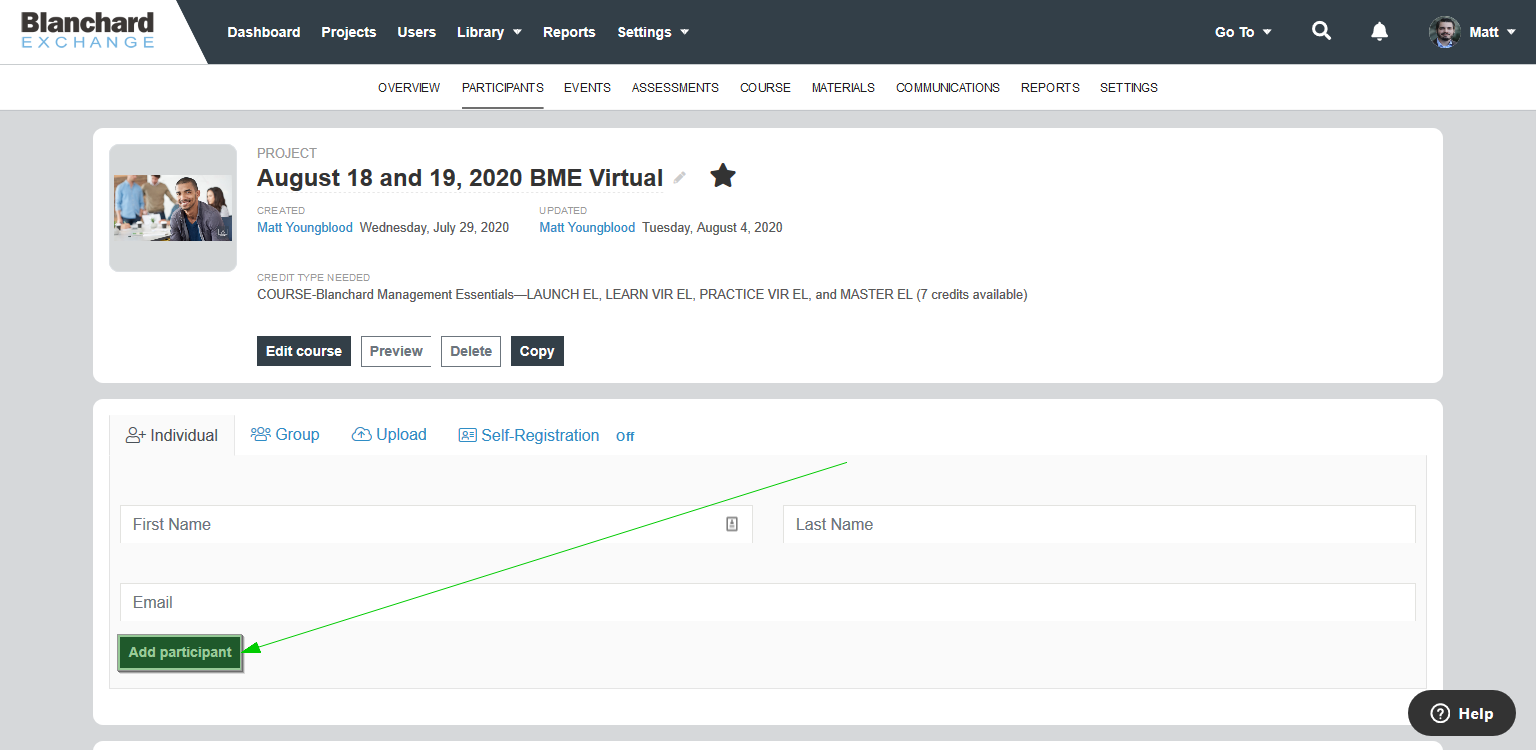
Figure 1
To add individual participants to a new or existing project, start by opening the project to which they should be added. Enter the participant’s name and email address on the main project overview screen, then click Add Participant. (Figure 1).
IMPORTANT! - If you are trying to replace an existing participant with a different individual, please refer to the tutorial How to Remove Participants From a Project before attempting to add another participant in their place.
Adding Groups
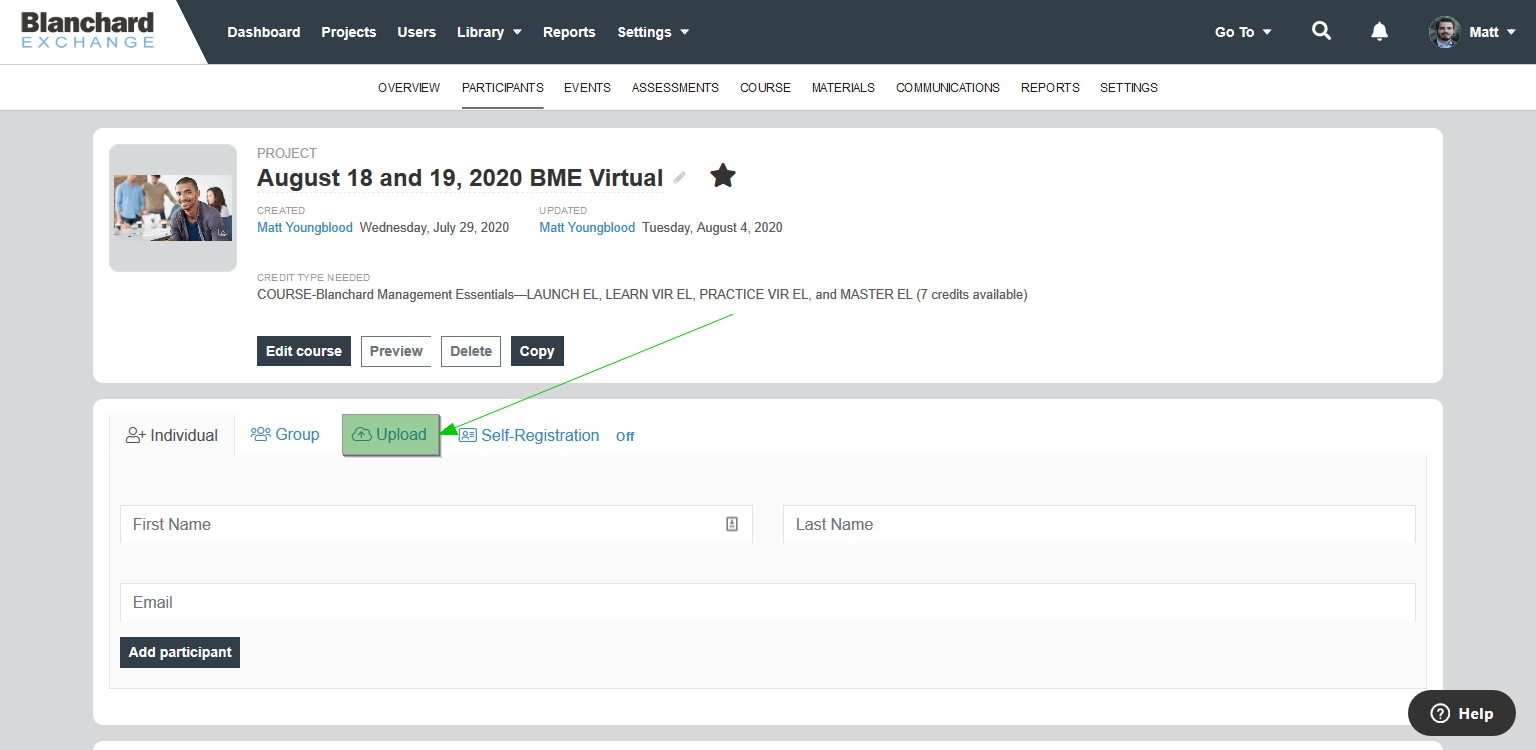

In order to add multiple learners at the same time to new or existing projects, you can use a roster template provided by Blanchard Exchange. Start by clicking on Upload Roster (Figure 2).
A window will open with additional options. You must use the roster template provided by Blanchard Exchange to upload groups. Download the template by clicking Download Roster Template (Figure 3-1).
Once you have filled in the roster template with learner names and email addresses, save it to your computer. Select Upload participant list to search for the file and upload it into your project (Figure 3-2).
Sending Emails
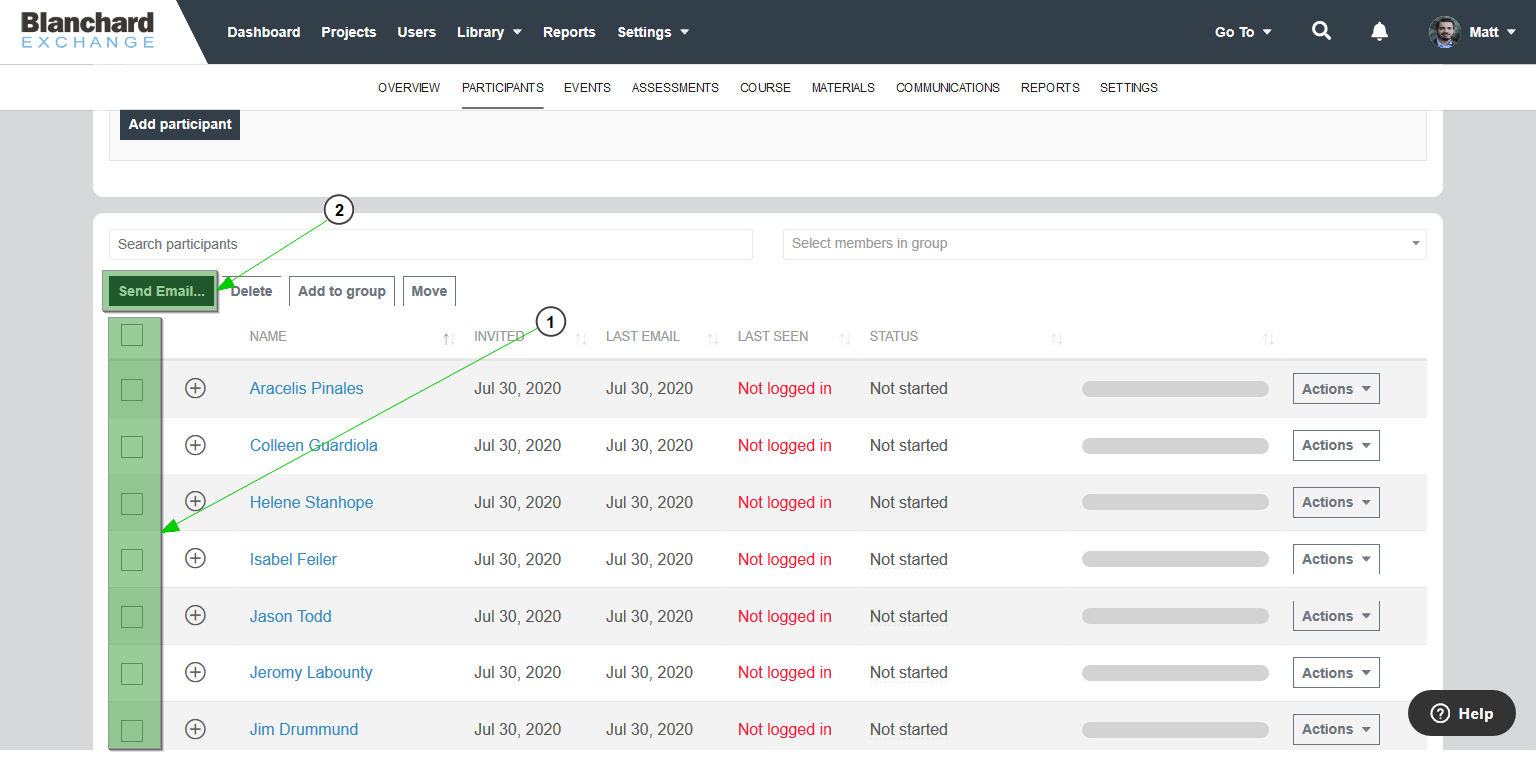
Figure 4

Figure 5

Figure 6
These instructions cover manually triggering emails to learners. If you are using automated communications to trigger emails, refer to the instructions found here.
On the next screen, select the checkbox next to the participant name(s) and click on Send Email... (Figure 4).
On the final screen, select the email template (Figure 5), make any necessary modifications, and click on Send Email (Figure 6).
| Tip: After sending invitations, wait a few minutes and then refresh the project's Participants page that displays your list of learners. This allows you to verify that no bouncebacks have been recorded. |
Editing

Figure 7
To edit a learner’s profile, open the project they are part of and click their name. Select the Edit button (Figure 7), make your changes, and save the user details. If you modify the learner’s email address, remember to resend the invitation email from BX.