

Administrators are typically individuals who set up learners with access to Blanchard Exchange, but this group can also include other role types that have some level of access to all project details within your account.
Adding Administrators
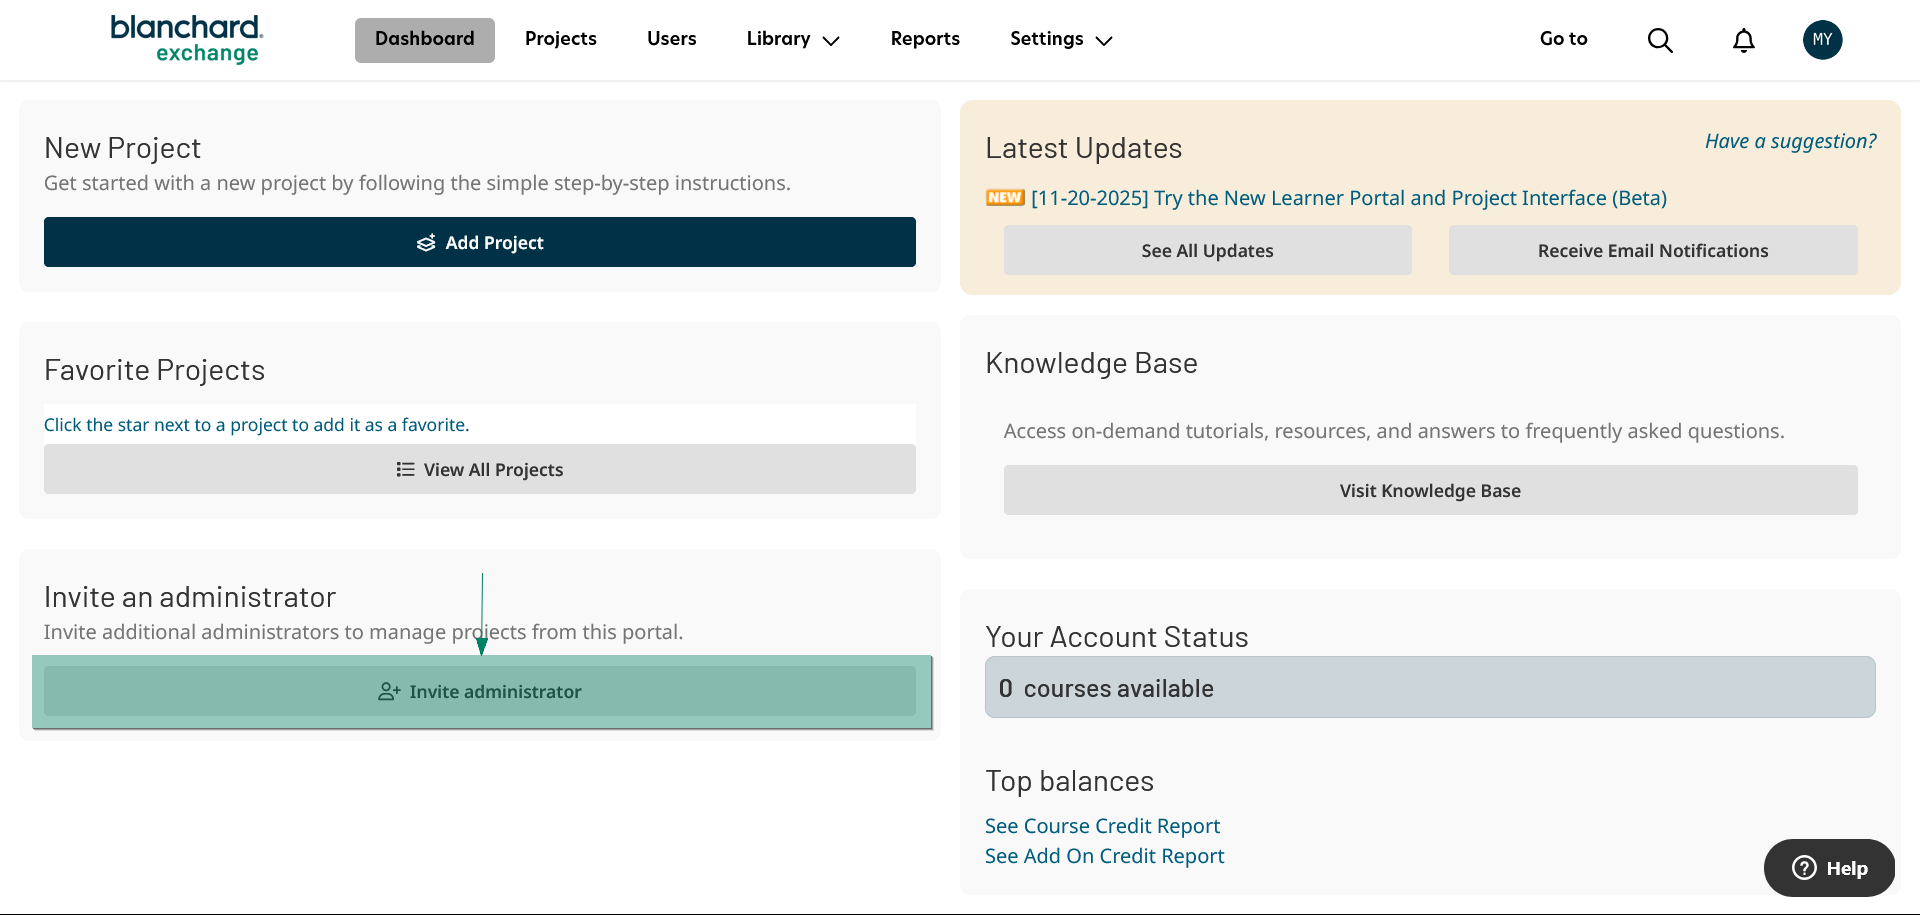
Figure 1
To add an administrator, click Invite Administrator from the home page (Figure 1) or go to the User tab and select Add User.
On the next screen, enter the user’s First Name, Last Name, and Email Address.
Next, open the Organization drop-down menu and select your organization’s name from the list. Then select the appropriate Language for the user.
Finally, select the appropriate role for the user:
Administrator: This individual has full access to your account and can add, edit, and delete information.
Read-Only Access: This individual can view details in your account but cannot add, edit, or delete information.
Account Trainer: This individual can view all project details in your account through the Trainer Portal interface. However, they do not have access to the Corporate Portal, which is the primary interface for the Administrator and Read-Only Access roles.
Note: Both the Administrator and Read-Only Access roles also include access to the Trainer Portal interface. For more information about the Trainer Portal, click here.
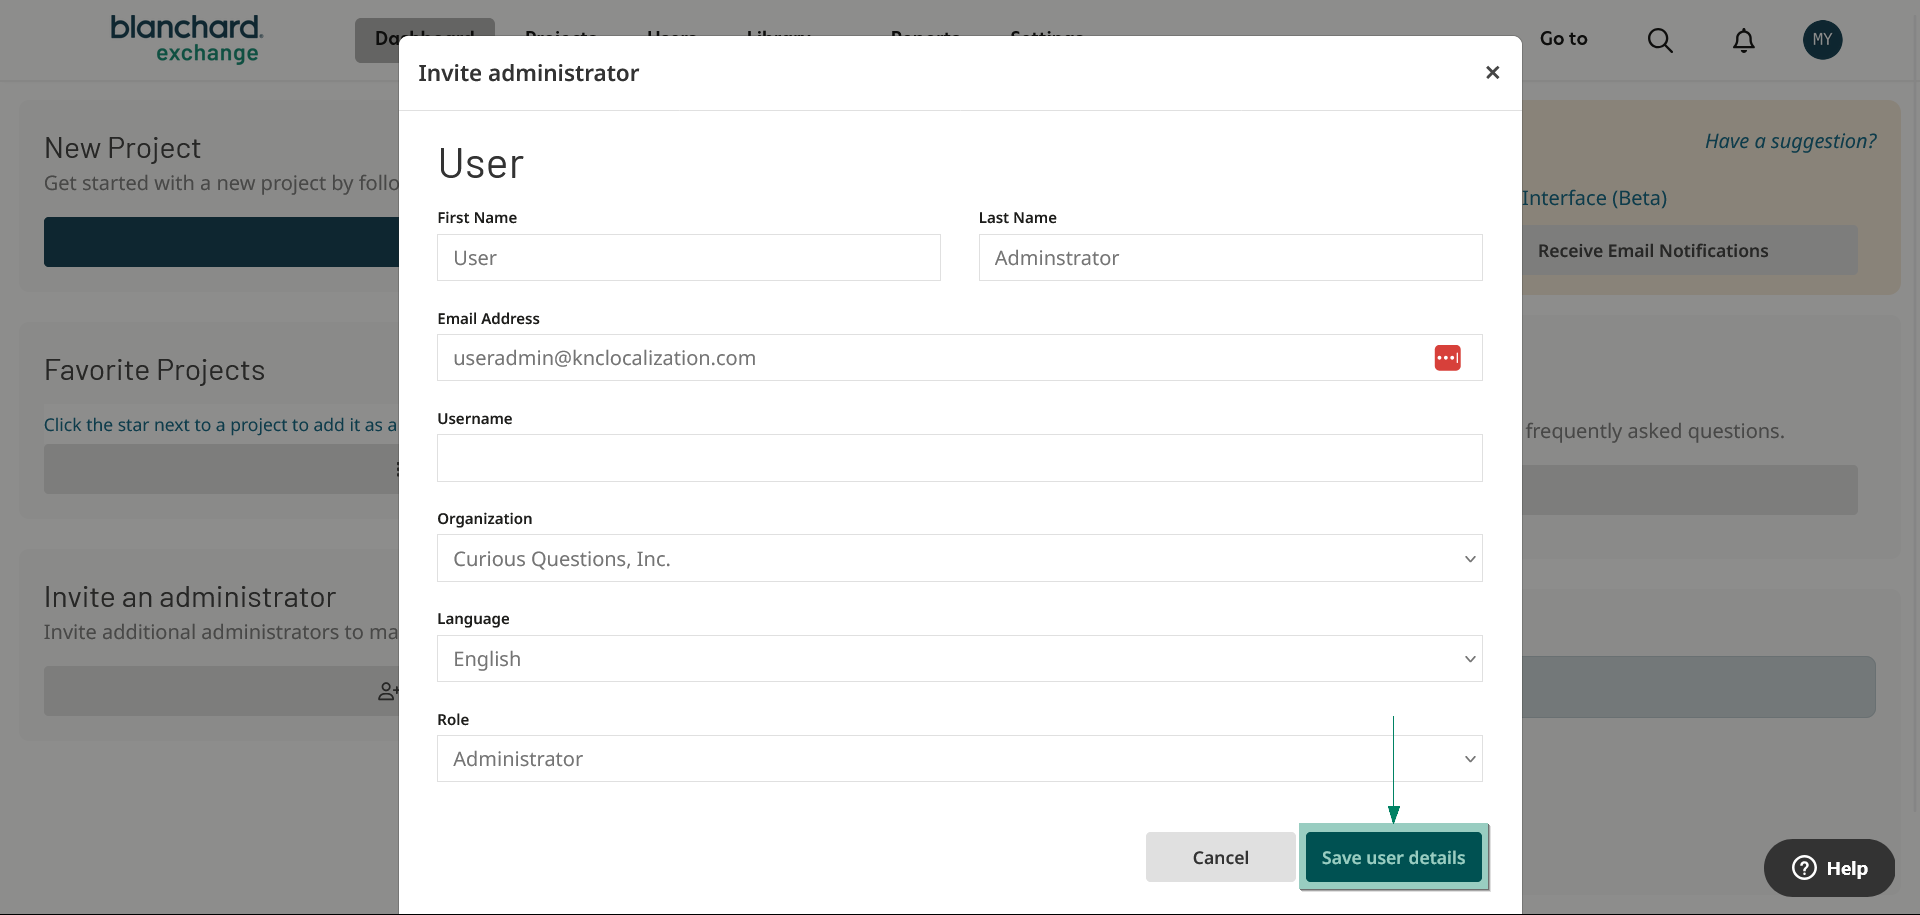
Figure 2
After selecting a role, click Save user details to proceed (Figure 2).
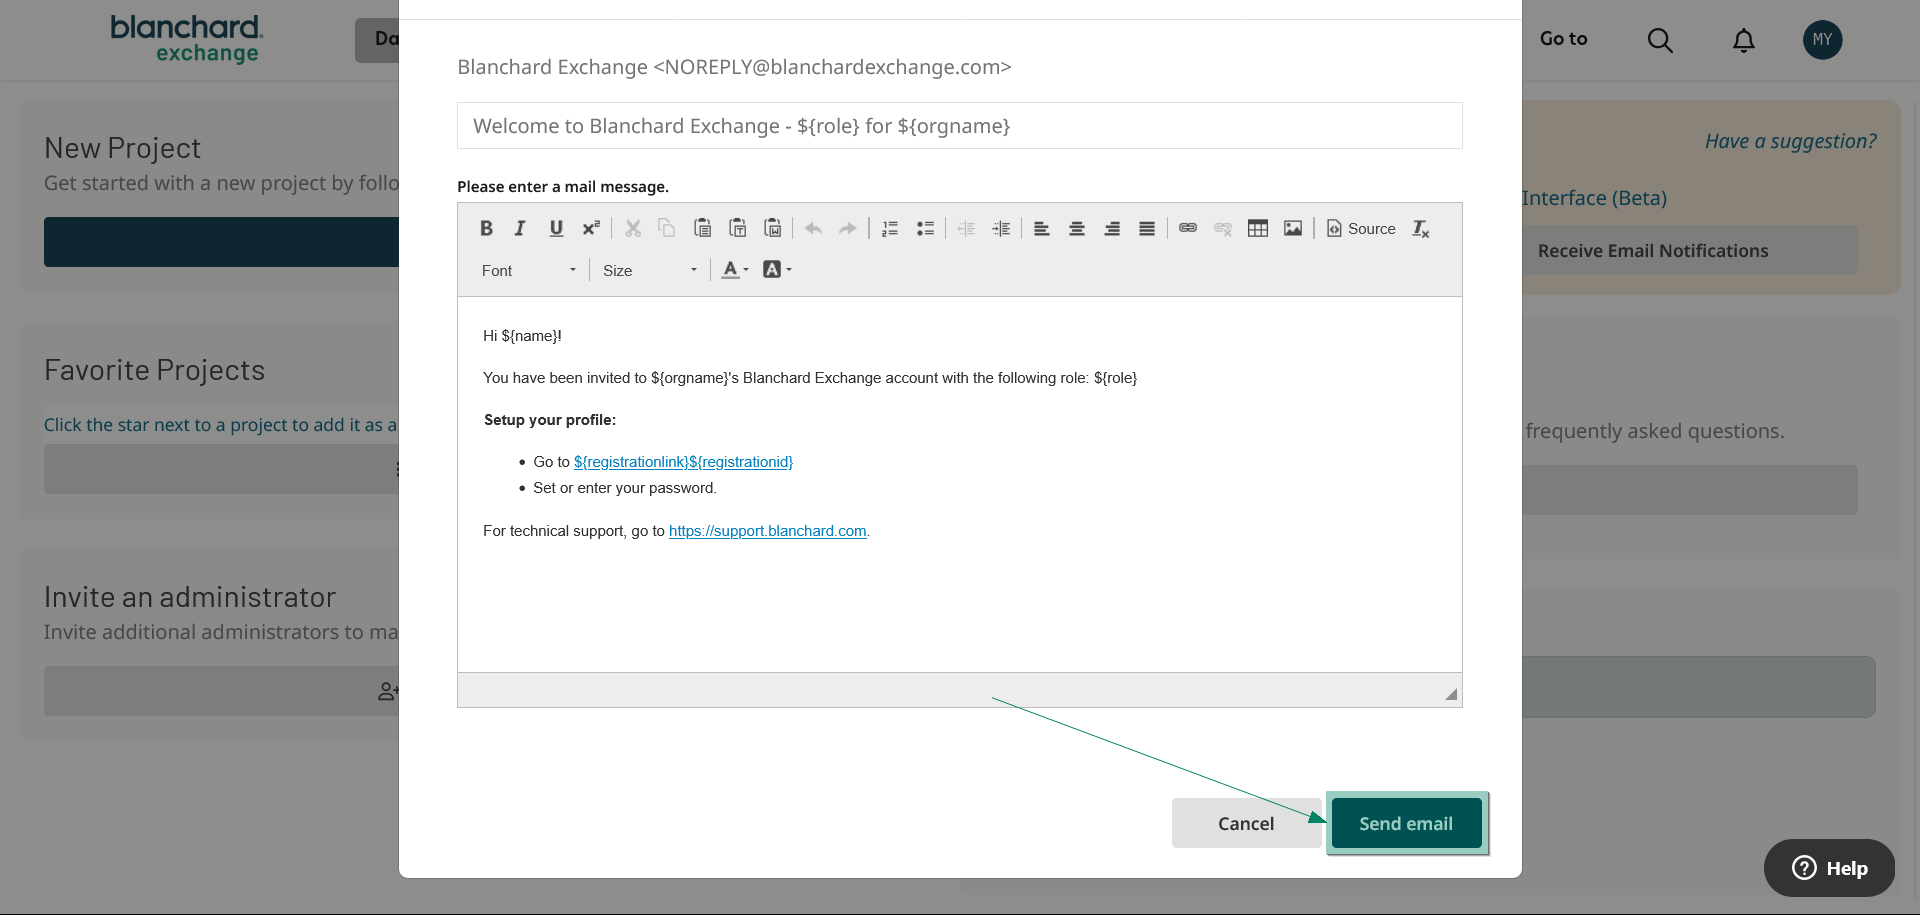
Figure 3
Edit the email and subject line if necessary, then click Send Email (Figure 3).
Editing Administrators
To edit an administrator, go to the Users tab, locate the individual, and select the user’s name. Click the Edit button at the top of the page, make your changes, and then click Save user details.